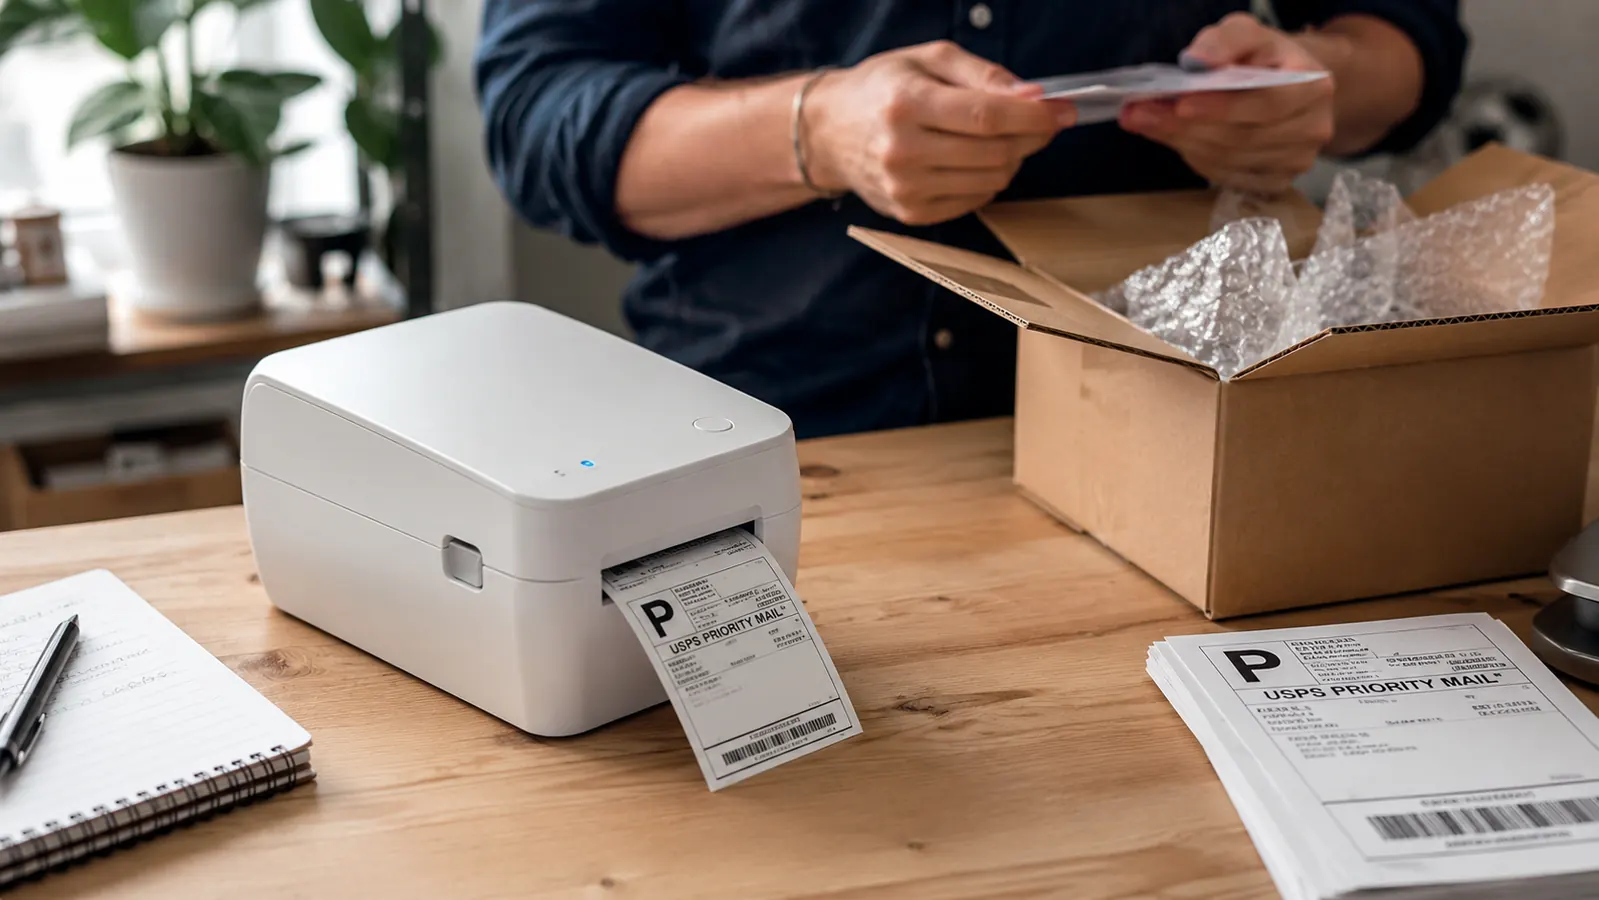
If you are shipping more than ten packages a week, printing labels on regular paper and taping them to boxes is costing you real time and making your operation look amateur. Customers notice sloppy labels. Carriers scan them at weird angles. You end up re-printing, re-taping, and burning minutes you do not have. The fix is a dedicated thermal label printer, and the one I consistently recommend to sellers on Amazon, Etsy, and eBay is the Rollo USB. It prints crisp 4x6 labels in under three seconds per label, uses no ink or toner, and runs off a direct USB connection with no fussy wireless pairing. The setup takes about fifteen to twenty minutes from box to first print. This guide walks you through every step.
The instructions below cover Windows and Mac. They also cover the four platforms where most of my readers actually sell: USPS Click-N-Ship, UPS from UPS.com, Amazon Seller Central, and Etsy. The process for eBay and ShipStation is nearly identical to the USPS flow once the printer is installed, so those are not repeated. If you already have the hardware and just need a specific platform, jump to the step that covers it. If you are starting from the box, read all five steps in order.
Still cutting paper labels with scissors? The Rollo pays for itself in the first month.
The Rollo USB thermal printer is rated 4.6 stars by over 16,000 sellers. No ink, no toner, no subscription. Plugs into any Mac or Windows machine and prints 4x6 labels directly from USPS, UPS, Amazon, Etsy, and eBay.
Amazon Check Today's Price on Amazon →Step 1: Unbox and Load Your Label Roll
Pull the Rollo out of the box. You will find the printer body, a USB cable, a power adapter, and a small starter roll of 4x6 labels. Set the power adapter aside for now. The Rollo runs off USB power on most computers, but the adapter is available if you connect it to a hub that does not deliver enough current. Open the top cover by pressing the button on the back of the unit. The label roll mounts on the spindle inside. Slide the roll onto the spindle so the labels feed from the bottom of the roll upward through the front slot. The printable side of the label should face up as it exits the slot. Confirm the roll is seated evenly, then close the cover until it clicks. The printer will auto-detect the label size when it powers on.
Labels for the Rollo come in 4x6 inch rolls, which is the standard size for USPS, UPS, FedEx, and all major carrier labels. Do not buy 4x3.33 or half-sheet labels by mistake. The Rollo only handles rolls, not fan-fold label stacks, so stick with standard rolls rated for direct thermal printing. The starter roll included in the box is enough for roughly thirty labels. Have a full 220-count roll on hand before your first real shipping run.
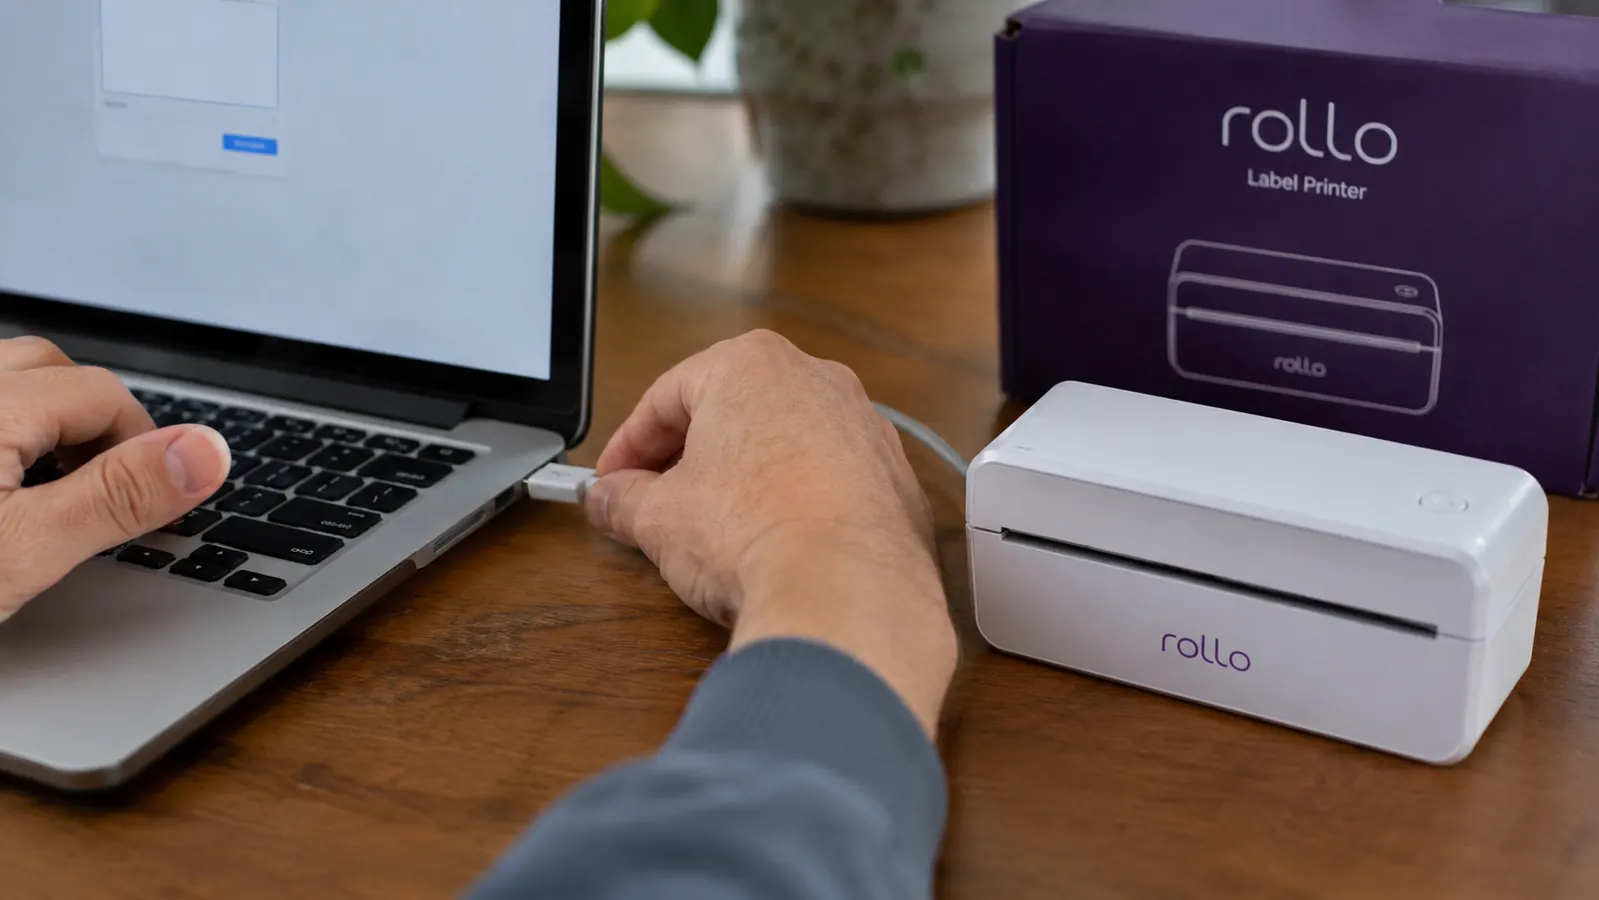
Step 2: Install the Driver and Connect via USB
Go to rollo.com/setup on your computer. The site detects your operating system and shows you the correct driver package. Download the Rollo print driver for Windows or Mac. On Windows, run the installer and accept the default settings. On Mac, open the .pkg file, follow the prompts, and allow the system extension when macOS asks for permission. This is the step where people stall. If the driver is blocked on Mac, open System Preferences, click Security and Privacy, and click Allow next to the blocked system extension. Restart the Mac after approving it.
Once the driver is installed, connect the Rollo to your computer using the included USB cable. On Windows, the device manager will detect the printer automatically and you will see Rollo Printer appear in your printer list within thirty seconds. On Mac, open System Preferences and click Printers and Scanners. Click the plus button to add a printer. Select Rollo Printer from the list. If it does not appear, unplug the USB, wait ten seconds, and replug it. Do not add it as a generic thermal printer. Adding it correctly under the Rollo driver is what unlocks proper 4x6 sizing.
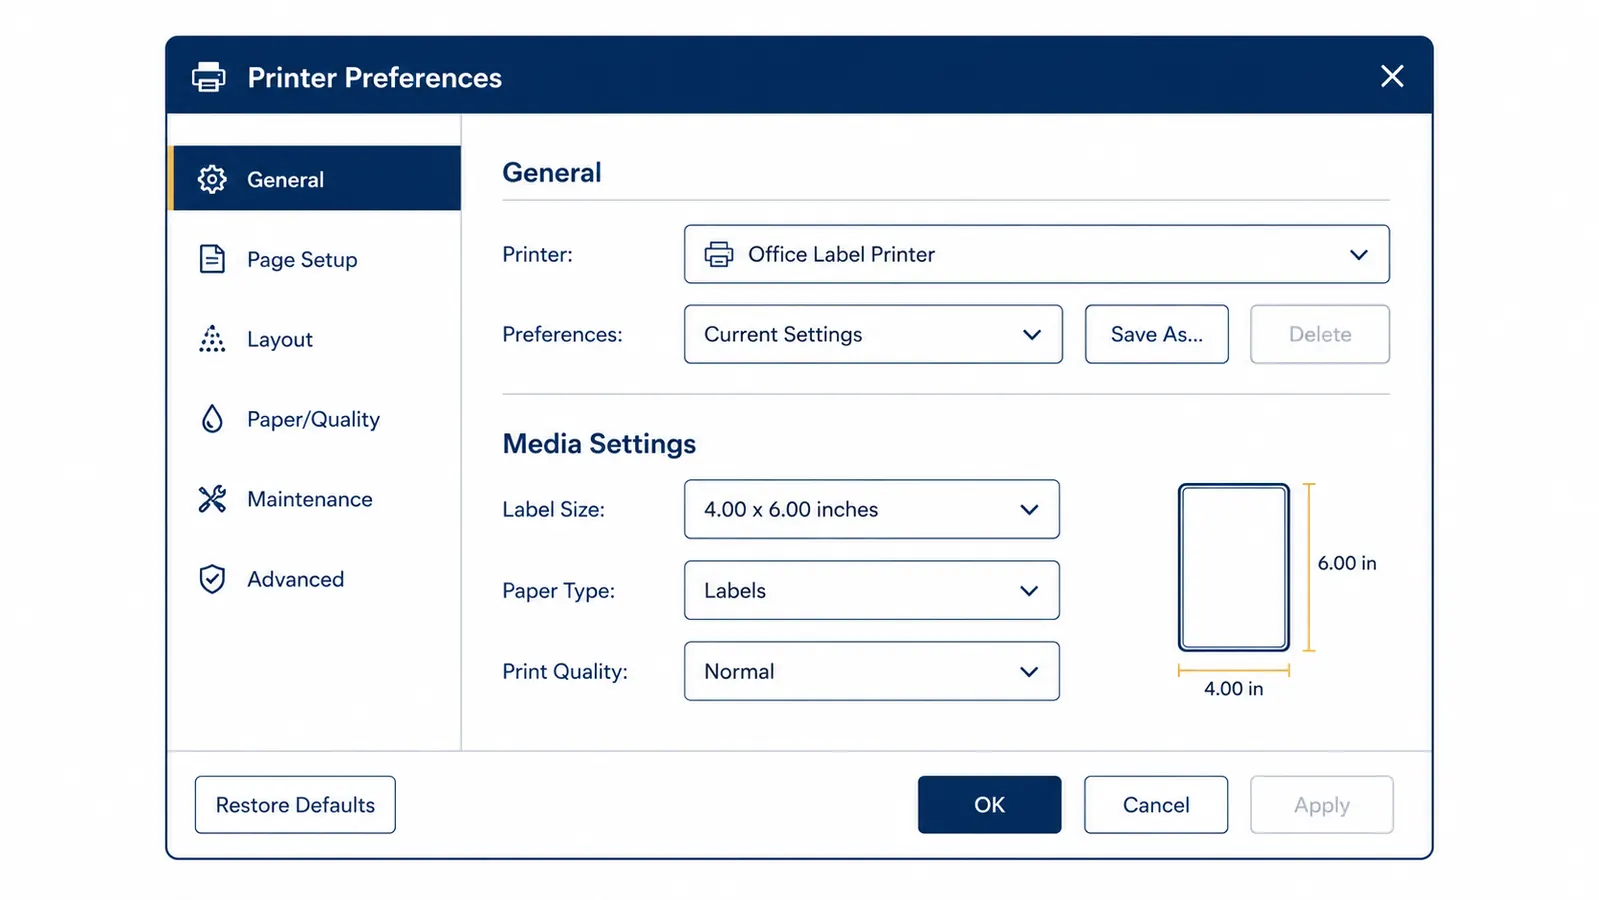
Step 3: Configure the Label Size in Your Printer Settings
This is the step most guides skip, and it is the one that causes cropped or scaled labels. Before you print anything, open your printer preferences for the Rollo and set the paper size to 4.00 x 6.00 inches. On Windows, go to Control Panel, then Devices and Printers, right-click the Rollo, and select Printing Preferences. Under Paper Size, choose 4x6 Label. Under Paper Type, choose Labels. Save those settings as the default. On Mac, when you open the print dialog for the first time, click the Paper Size dropdown and choose Manage Custom Sizes. Add a custom size of 4 inches wide by 6 inches tall, with zero margins. Name it Rollo 4x6 and save it.
Do a test print before pulling labels from your live shipping accounts. Open any PDF and print one page scaled to fit the Rollo 4x6 paper size. The printout should fill the label exactly, with no white borders above or below. If the image is too small or appears centered with white space around it, the page size is wrong. Go back to your printer preferences and re-confirm the 4x6 setting is saved as the default and not just selected for this single print job. Getting this right once saves you from wasting labels and re-printing orders.
Step 4: Print from USPS, UPS, and Amazon Seller Central
For USPS Click-N-Ship, log in and create your shipment as normal. On the payment confirmation page, USPS will offer to print your label. When the print dialog opens, select Rollo Printer from the printer list. Confirm the paper size is 4x6 and click Print. The label pops out in about three seconds. USPS also offers a PDF download option. If you prefer to batch-download labels and print them later, download the PDF, open it, and print directly to the Rollo using the same 4x6 settings. Either method works.
For UPS, go to UPS.com and create your shipment. On the print screen, UPS defaults to a browser print dialog. Select Rollo Printer and make sure the page scaling is set to None or Actual Size. Do not let the browser scale the label to fit a letter-size page. That will shrink the barcode and cause scanner errors at the UPS facility. The same rule applies for FedEx Ship Manager.
For Amazon Seller Central, go to Manage Orders and select the order you need to ship. Click Buy Shipping and complete the carrier selection. When Amazon generates the label, it opens as a PDF in a new tab. From that tab, print directly to the Rollo. Make sure Amazon's print settings are set to actual size, not fit to page. If you use a third-party tool like ShipStation or Shippo, both have a label printer integration where you set Rollo as your default printer in their settings menu. Once configured there, every label you buy through those platforms prints automatically without a separate print dialog.
The Rollo takes about fifteen minutes to set up from unboxing. Once it is configured, printing a label takes less time than peeling a stamp.
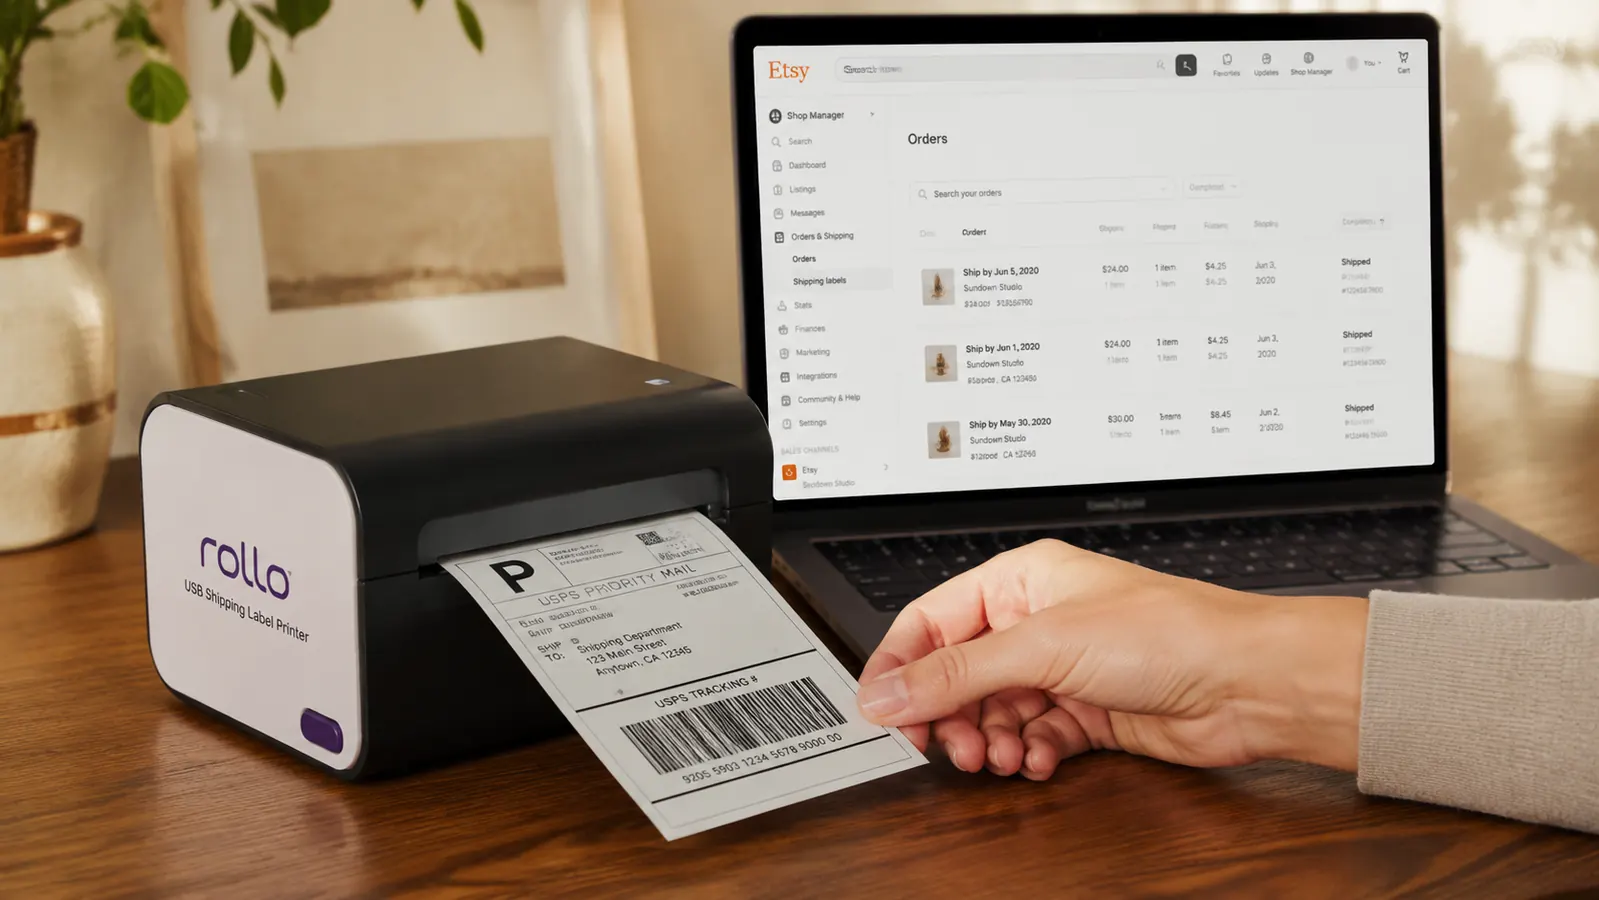
Step 5: Print Directly from Etsy and eBay
Etsy has a built-in label purchase system that works cleanly with the Rollo. Go to Your Shop, then Orders, and click the ship icon on the order you need to fulfill. Select your carrier and service, enter the package weight, and purchase the label. Etsy generates a PDF. Click Print Label and your browser print dialog opens. Select Rollo Printer, set paper size to 4x6, and print. If you have already saved Rollo 4x6 as your Mac custom paper size or your Windows default, this step takes about five seconds.
eBay works the same way. Go to Seller Hub, find your sold order, and click Ship. Purchase postage through eBay's integrated USPS or carrier system and print the generated PDF directly to the Rollo. One thing worth noting on both Etsy and eBay: if your browser is set to open PDFs in a preview app instead of the browser itself, you may get kicked into Adobe Acrobat or Preview before the print dialog opens. That is fine. Just make sure to choose Rollo Printer from whichever application opens the PDF, and confirm the 4x6 paper size before clicking Print.
What Else Helps Once the Rollo Is Running
The Rollo handles the printing side. There are a few adjacent tools that make the shipping station complete. A postal scale is the first. If you are guessing package weights, you are either overpaying for postage or getting packages returned for insufficient postage. A basic USB postal scale in the ten-to-seventy-five-dollar range sits next to the Rollo and feeds weight into USPS Click-N-Ship or Etsy Shipping automatically when connected. The Dymo M10 and the Smart Weigh SWS600 are two reliable options at different price points.
The second tool worth adding is a shipping software account if you are hitting more than thirty to forty orders a week. ShipStation, Pirateship, and Shippo all give you access to Commercial Plus USPS pricing, which runs meaningfully lower than retail Click-N-Ship rates, especially on Priority Mail. The Rollo integrates directly with all three. You set Rollo as the default label printer in the platform settings, and every label you buy through the platform prints automatically. No individual PDFs, no print dialogs. You click Buy Label and the Rollo fires. That workflow becomes important as volume grows.
For more detail on why dedicated thermal printing pays off at scale, see the companion article on this site covering the ten ways a label printer saves time for ecommerce sellers. And if you are deciding whether the Rollo is the right printer for your business versus other thermal options, the long-term Rollo review covers six months of daily use across a real ecommerce operation.
Ready to stop printing on paper? The Rollo is the only tool I recommend for this.
4.6 stars, 16,000-plus verified buyer reviews. Prints any carrier label in under three seconds. No ink, no subscriptions, no Wi-Fi required. Works with Amazon, Etsy, eBay, USPS, UPS, FedEx, and every major shipping platform out of the box.
Amazon Check Today's Price on Amazon →